
Domes
Domes
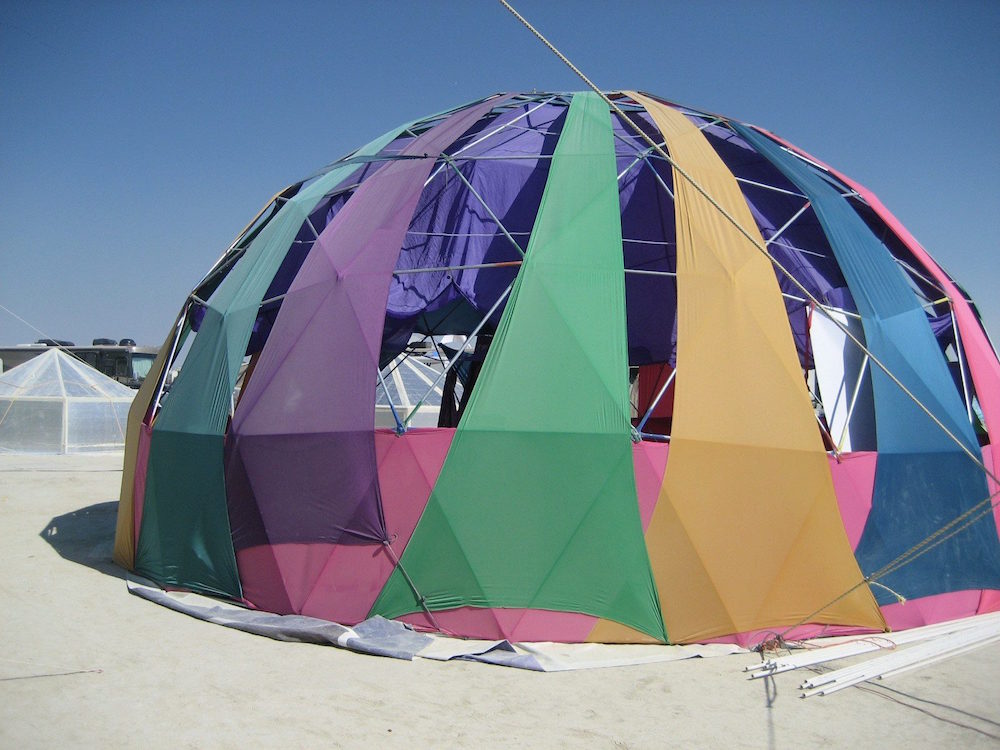
We have 4 domes that are 30.5' 4V domes made from 3/4" conduit. The domes have vinyl covers, full interiors, lighting and cooling. Some specs on the struts appear at the end of this page.
Chill Dome 2013
Chill Dome 2014
Workshop Dome 2013
4V assembly diagram
Dome building is much easier than it might seem when you first encounter one. The secret is in abiding by the 5 rules of dome building:
1. Domes are built from the top down
2. Every time a fastener is put in, all the struts that are on that fastener are installed.
3. Every time a hexagon or pentagon is closed, the spokes must be convex (I'll explain later)
4. Once yellow struts are used 2/3 through the process, the dome is allowed to stand on its struts.
5. Leave joints loose until you have assembled 2 joints away. then you may fully tighten those joints. This is convenient as this is about the point that they become too high to reach as well.
Notice that Domes are hade up of hexagons and pentagons. The pentagons have the yellow struts in the center. There are 6 pentagons; one at the top and five around the perimeter.
A good dome building team has about 7 people in it
1 bolt sorter
1 map holder/director
1 strut runner
4 assemblers
In the initial stages you only need 2 assemblers. The extra 2 assemblers can help make bolt sets. A bolt set is a bolt with a nut and washer screwed together. There is a big bucket of loose parts that need to be made into sets. Discard any that have been cross threaded.
The first step is to build the top pentagon. When attaching all the struts to the end of the yellow spokes, put the center on a 5 gallon bucket to lift it and make assembly easier. When you get to adding in the green struts, put the dome on an articulating ladder set at its lowest height. Once you are using the ladder at its highest height, it is time to stand the dome on its own legs.
You will soon see that the overall structure of a dome is a bunch of hexagons with radial spokes. The spokes are calculated to be longer than the spokes of a wheel such that the hexagon cannot lay flat. that is what gives a dome its shape. That means that when you insert a bolt that closes the perimeter of a hexagon, you must make sure that the "spokes" are projecting outward and not inward. You can't fix this later.
The map holder is directing the strut runner to stage the needed struts at each intersection. they do not need to be laid out in any particular order, there just needs to be the correct number. Once the dome gets past the blue struts, 2 assembly teams can be working simultaneously on opposite sides of the domes. Once you start installing yellow struts again, the dome can be made to stand on the downward pointing struts. Just push them inward and arrange them into triangles as shown on the map. this will lift the dome off the ladder.
Assembly now proceeds very differently and very rapidly. each joint has 4 struts that lay on the ground horizontally. Two go to each neighboring joints and 2 float free. once all the struts for that layer are installed, a few extra people are called over and the whole dome is lifted at once. All the free struts scissor down and become the new supporting legs. The map holder checks that all the correct struts are coming together and then assembly proceeds for the next layer.
Struts have bend at their ends. This is what creates the spherical shape. That means there is a right and a wrong orientation for the strut. If you run across a strut where one end is bent in the wrong direction, just re-bend it with a crescent wrench.
Covers
New for 2016 are vinyl covers for our domes. Since these have not even been made yet, there is minimal information how they will be installed. Check back later.
Interiors
The two domes we currently have are used for a chill space and a workshop space. The main difference is in how the interiors are made
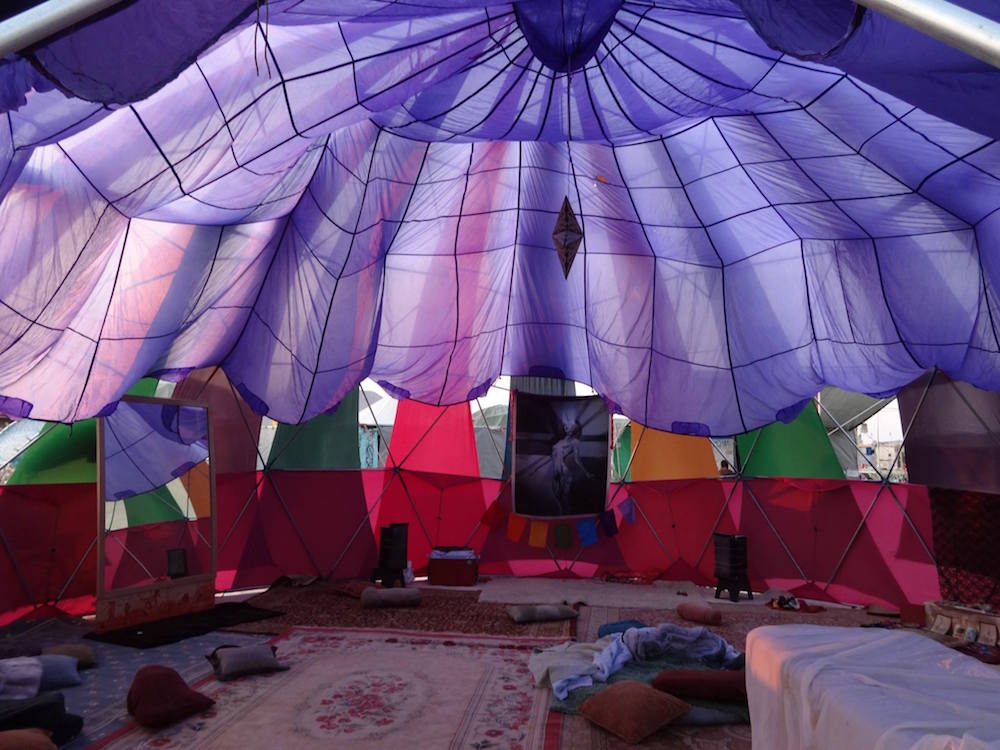
Chill Dome
The first two photo above are of the chill dome. It has a rope light spiral and hanging pendant light, colorful fabric triangles, an upper fan, a lower mist fan, full carpets, throw pillows and a giant mirror.
Here is the order in which it is assembled
1. Install upper fan, Use zip ties to hold it in place. Make sure it blows up and out. There may be a fan gasket but we won't know until the cover is built. Run a power cord between the cover and the struts.
2. Install power snake. Zip tie switch pox at a convenient height near doorway. Place second box as high as it will go.
3. Make rope light spiral starting at top. You can disassemble rope lights into shorter lengths to make it easier. test entire string before installing. Sometimes they go dead.
4. Install Fabric triangles. There seems to be good success with finding enough colors for a chakra spectrum. All the extra reds and pinks are used for the workshop space.
5. Smooth out playa and lay out floor. Each floor is made out of 3 pieces.
6. While all the lighting work is being done, another crew can be shop vacuuming all the area rugs. There needs to be dance mats deployed to do this but they usually are by this time. Once all the carpets are cleaned they can be put in the dome. Start with smaller carpets first around the periphery. Use the best carpets in the center. Use a shit carpet in the door way and in front of the cooler opening.
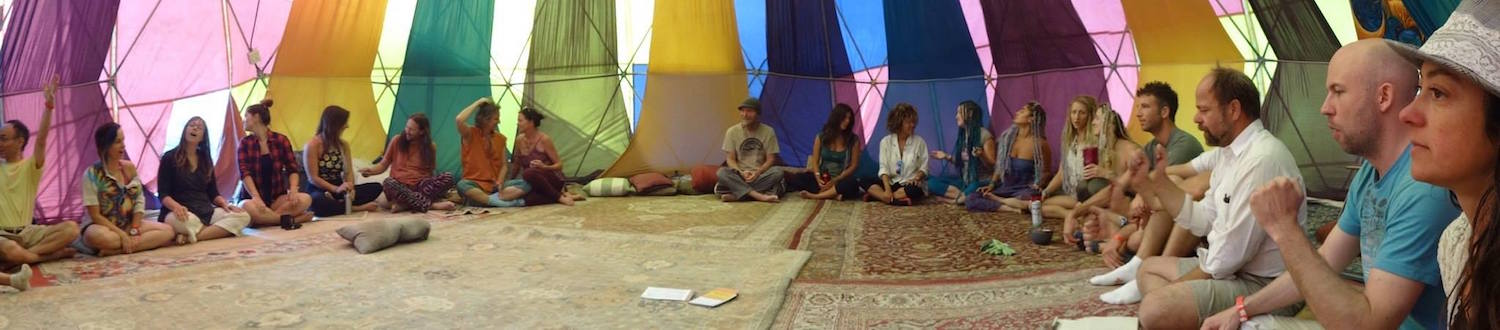
Workshop Dome
The third photo is of our old workshop dome. in 2016, the workshop dome will probably be much different as it will have a vinyl cover
Dome Strut Specifications
| Strut | Length | Qty | Color |
| A | 3.860 | 30 | Yellow |
| B | 4.502 | 30 | Red |
| C | 4.491 | 60 | Blue |
| D | 4.771 | 70 | Green |
| E | 4.995 | 30 | Purple |
| F | 4.553 | 30 | Orange |
CAUTION
The colors of dome struts are NOT an indicator of length universally. They indicate position in the structure for a particular dome. If our struts were to get mixed up with struts from another camp, it could be a disaster if it were not noticed until we got home! I also built the struts for most of Camp Contact's domes and they are identical, but they do have an oddball dome that doesn't usually come to the playa..... but it could. Be very careful to not commingle parts with another camp.